


- What are the benefits of vaping dry herbs?
- The Critical First Step: The “Burn-Off”
- What You’ll Need to Use a Dry Herb Vaporizer (Quick Checklist)
- Quick Rundown: How to Use a Dry Herb Vaporizer
- Step 1: Prepare Your Herb
- Step 2: Load the Chamber: Packing for Perfect Airflow
- Step 3: Power On and Preheat
- Step 4: Master Your Temperature: The Art of Flavor and Effect
- Step 5: The Inhalation Technique
- Your Essential Dry Herb Vaporizer Cleaning & Maintenance Toolkit
- How to clean a Dry Herb Vaporizer
If you’re new to vaporizers, want to make your dry herb vaporizer deliver the kind of sessions people rave about, you’re in the right place. This guide will teach you everything you need to know to not only achieve amazing sessions. But it will also allow you to understand the fundamentals of vaporizing dry herbs, so no matter what device you pick up, you will know exactly how to maximize it.
As you read, keep one idea in mind: every vaporizer tends to focus on a specific aspect, such as pure flavor, dense vapor, or easy portability. You cannot maximize all of these at the same time due to simple thermodynamics laws. What we can do is learn the common trade-offs so you can lean into your device’s strengths and choose wisely when you upgrade.
Later on, we will move into real use. You will learn the fundamentals of proper sessions and how to play with your device’s settings to achieve the types of sessions you’re looking for. By the end of this guide, you will learn everything you need to know to get the absolute most out of your dry herb vaporizer.
What Exactly Is a Dry Herb Vaporizer?
Before we get into too many details, let’s start by understanding what a dry herb vaporizer. At the simplest level, a Dry Herb Vaporizer is an electronic device that heats cannabis gently enough to release cannabinoids and terpenes as vapor without burning the plant. Instead of an open flame, it uses controlled heat.
Most modern devices are battery-powered. Power from the battery feeds a small heater that sits under or around a chamber where the herb goes. The chamber is usually stainless steel or ceramic, sometimes paired with glass parts in the air path for cleaner flavor.
There are different ways devices move heat into the herb and many small design choices that change the feel of a session. We will cover those methods and what they mean for flavor, density, and ease of use later. For now, remember this idea. Small variables like grind, how firmly you pack, the temperature you choose, and how you draw can shift results a lot, even when the device is doing its job correctly. This guide will show you how to use those variables to your advantage.
Dry Herb Vaporizer: How Does It Work?
So, how does a dry herb vaporizer work? The process is simple once you break it down:
- Heat source: Inside the vaporizer, there’s a small heating element powered by a battery (portable vapes) or wall outlet (desktop vapes).
- Chamber: Your ground herb sits in a small oven or chamber near the heat source.
- Controlled heating: The device raises the temperature just enough to turn cannabinoids and terpenes into vapor. This is below the point of combustion, so nothing burns.
- Airflow path: As you inhale, the hot air passes through your herb, lifting out the active compounds and flavors. That vapor then travels through a mouthpiece for you to enjoy.
That is the simple version. Getting the most from any vaporizer means understanding what your specific device is designed to excel at. The more familiar you are with its heating behavior, airflow, and small quirks, the easier it becomes to dial in smooth, flavorful, repeatable sessions. Let’s begin your journey by taking a look at a fundamental aspect of your vaporizer: the heating method.
Conduction vs. Convection vs. Hybrid Heating: The Core Differences
Every dry herb vaporizer utilizes one of four heating methods: conduction, convection, or a hybrid combination. Knowing the difference is crucial because it affects how your vapor tastes, how evenly your herb cooks, and much more.
Conduction Heating
- Works like a frying pan: your herb comes into contact with a hot surface and heats directly.
- Pros: Fast heat-up, simple to use, great for beginners.
- Cons: Can cause uneven cooking (“hot spots”) if you don’t stir.
Convection Heating
- Works like an oven with hot air: the herb is cooked by heated air rather than direct contact.
- Pros: Superior flavor, more even extraction, no scorching.
- Cons: Usually slower to heat, can drain more battery.
Hybrid Heating
- A mix of both: conduction preheats the chamber while convection hot air finishes the job.
- Pros: Balance of speed, flavor, and vapor density.
- Cons: Devices can be pricier; still may need stirring depending on design.
| Heating Style | Flavor | Vapor Density | Learning Curve | Typical Devices |
| Conduction | Good | Dense, quick hits | Easiest | Entry-level portables |
| Convection | Excellent | Lighter but very smooth | Medium | High-end portables, desktops |
| Hybrid | Very good | Balanced (flavor + clouds) | Easy–Medium | Mid/high-tier modern vapes |
👉 Bottom line:
- Choose conduction if you want quick, straightforward sessions.
- Choose convection if you’re a flavor purist.
- Choose hybrid if you want the best of both worlds (what most people end up loving).
What are the benefits of vaping dry herbs?
Quick take: Compared with smoking, dry-herb vaporizing can reduce exposure to combustion toxins, feel gentler on the airways, and offer more control over flavor and effects. Also, Vaporizers save you money by being extra efficient at extracting your herbs, so you can stretch them out further than regular smoking can.
Less Smoke, Fewer Harsh Toxins
Smoking burns your herb, which creates tar and carbon monoxide, the same stuff that makes smoke feel rough on your throat and lungs. Vaporizers heat the herb just enough to release cannabinoids and terpenes, but without combustion. As a result, you get the cleaner vapor, gentler on your body, and far less coughing.
Better Flavor
When you vape, you actually taste the terpenes, those aromatic compounds that give strains their citrusy, piney, or earthy character. Lower temps bring out delicate flavors, while higher temps deliver richer, more robust notes. Smoking usually masks those flavors with the burnt taste of plant material.
Smoother Experience
Because there’s no harsh smoke, many people find vaping much easier on their airways. Vapor usually feels lighter and less irritating.
You Get More Out of Your Herb
Vaporizers extract cannabinoids more efficiently than burning. That means you often use less flower.
Discretion
Portable vaporizers produce less odor, and what little there is tends to dissipate quickly. That makes vaping a great option for stealth sessions when you don’t want strong, lingering smoke hanging around your clothes or room.
More Control
Most vaporizers come with adjustable temperature settings. This lets you fine-tune your experience, whether you want light, flavorful sips at lower temps or denser, heavier vapor at higher ones. Smoking doesn’t give you this level of precision.
Vaporizers come in various forms and heating styles, which can significantly alter your experience. Choosing between portable vs. desktop devices is the first step in finding your ideal vape style, and we’ll break those down in the next section.
Portable vs. Desktop Vaporizers: Finding the Right Fit
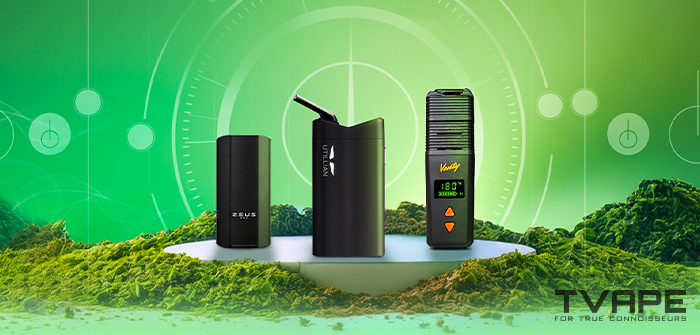
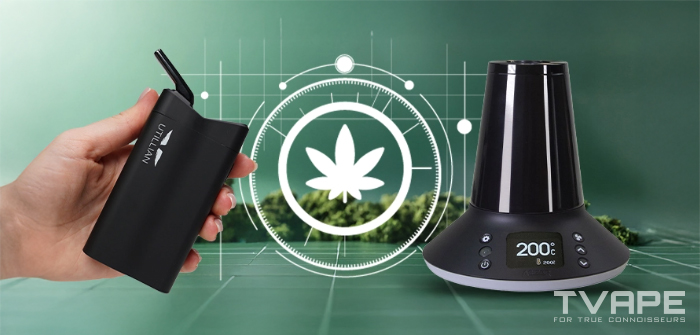
Not all dry herb vaporizers are built the same. The biggest divide comes down to whether you want something portable and pocket-sized or a desktop powerhouse that lives on your table. Both have their place. It just depends on how, when, and where you like to vape.
| Feature | Portable Vaporizers | Desktop Vaporizers |
| Size & Portability | Pocket-friendly, battery-powered; ideal for on-the-go use | Bulky, designed for home use; typically plugs into wall power |
| Power & Performance | Limited battery life; smaller oven capacity | Consistent power, larger chambers, denser vapor production |
| Ease of Use | Simple, quick heat-up, discreet | More complex setups sometimes need hoses or balloons |
| Vapor Quality | Good flavor and vapor density, but can be thinner on cheaper models | Superior flavor and clouds thanks to stronger heaters and convection systems |
| Best For | Casual users, beginners and anyone who values portability | Heavy users, flavor chasers, or people who prefer group/home sessions |
If you’re new to vaping, a portable vaporizer is usually the best starting point as they are affordable, simple, and discreet. If you’re a serious enthusiast who values maximum vapor density and flavor (don’t mind being tethered to a plug), a desktop vaporizer will feel like a luxury upgrade.
What Is the Best Dry Herb Vaporizer?
The truth is, there’s no single “best” dry herb vaporizer for everyone. The right choice depends on how you vape, where you vape, and what you value most.
- If you want stealth and portability → look for a small, battery-powered portable vape.
- If you want big, flavorful clouds at home → a desktop vaporizer like the Volcano remains the gold standard.
- If you want a balance of flavor, clouds, and ease of use → a hybrid portable is usually the sweet spot.
Other factors to consider when picking the best vape for you:
- Budget: Entry-level conduction devices are usually affordable, while premium convection/hybrid models can be an investment.
- Battery Life: On-the-go users should prioritize long-lasting batteries or swappable cells.
- Temperature Control: More precise controls = more customization for flavor and effect.
- Cleaning & Maintenance: Some models are designed for easy disassembly and quick cleaning.
- Accessory Compatibility: Some devices come with accessories that can alter your entire session experience.
Still not sure where to start? Check out our Best Dry Herb Vaporizers ranking page for an up-to-date breakdown of the top devices in 2025, with pros, cons, and core features.
Step-by-Step: How to Use a Dry Herb Vaporizer
The Critical First Step: The “Burn-Off”
Alright, now let’s get to the actual practical information. Before using a new dry herb vaporizer for the first time, it is essential to perform a “burn-off” cycle. This crucial, yet often overlooked, initial step involves turning the device on and setting it to its maximum temperature without any herb in the chamber. The purpose of this process is to vaporize any residual manufacturing lubricants or particles that may be left in the device, which could otherwise introduce an unpleasant taste or odor to the first few sessions. The device should be left to run for a full cycle until it shuts off automatically. If a lingering factory smell persists, a second cycle may be necessary to ensure a clean, pure taste from the very first use.
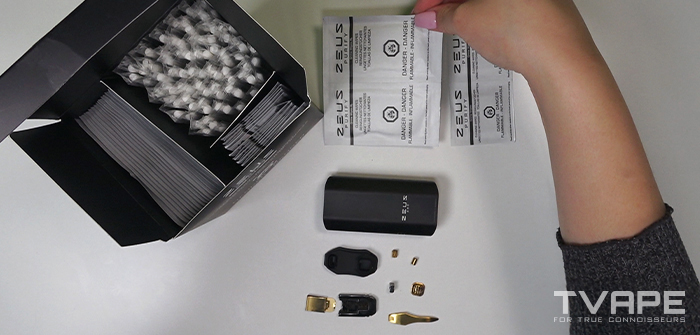
What You’ll Need to Use a Dry Herb Vaporizer (Quick Checklist)
Before diving into the step-by-step process on how to use dry herb vaporizer, it helps to have the right tools on hand. A well-prepared setup makes vaping smoother, more efficient, and easier to maintain. Here’s your quick starter kit:
- Dry Herb Vaporizer – Portable or desktop, depending on your lifestyle.
- Quality Grinder – Creates an even, medium-fine grind for consistent heating and smooth airflow.
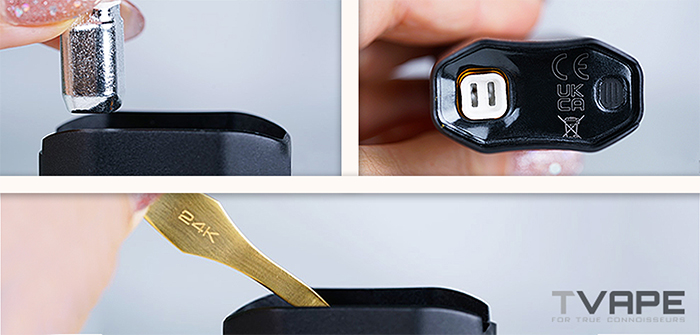
- Packing Tool or Tamper – Helps load the chamber evenly without over-compressing.
- Small Cleaning Brush – For brushing out the oven and screens after each session.
- Cotton Swabs + Isopropyl Alcohol – For deeper cleaning of removable parts.
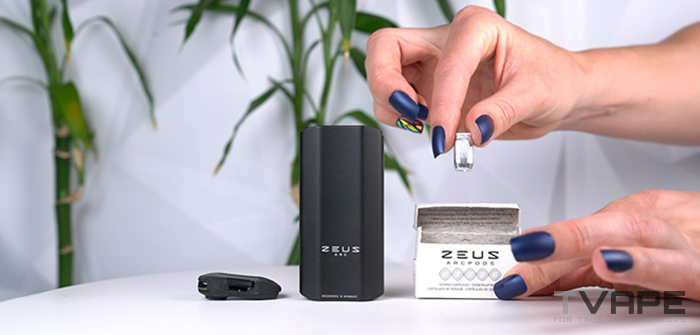
- Optional: Dosing Capsules – Keep sessions mess-free, enable microdosing, and make swapping bowls fast.
- Optional: Ice Filter or Water Bubbler – For smoother hits at higher temperatures.
So, without further ado, let’s see how to use dry herb vaporizer and get the most out of it.
Quick Rundown: How to Use a Dry Herb Vaporizer
Here’s a quick rundown on how to vape dry herbs for beginners.
- Grind your herb
- Load the chamber
- Power on & preheat
- Set your temperature
- Inhale slow & steady
- Empty & quick clean
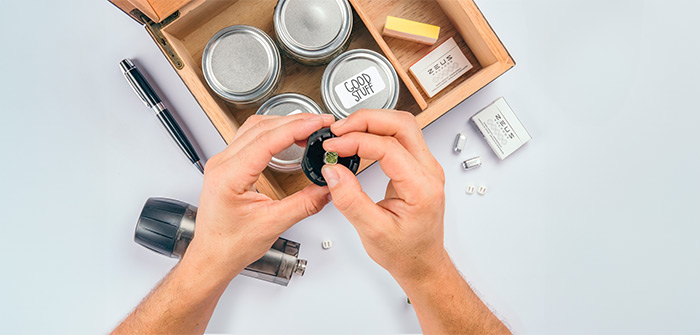
Step 1: Prepare Your Herb
The grind is the foundation of a good session. Too coarse and the herb will heat unevenly. Too fine and you risk clogging screens and choking airflow. Aim for a medium-fine, fluffy texture that lets hot air move through while exposing plenty of surface area for even extraction.
A consistent grinder makes this easier. Many quality grinders produce a medium-coarse to medium-fine result that works well across most devices. The Xtruder is a strong option if you want extra consistency. It uses helix blades to create a light, uniform grind that packs cleanly. Remove stems before grinding, give the chamber a brief shake to loosen clumps, and avoid grinding into powder unless your device specifically prefers it. Ultimately, it is worth experimenting. Try a slightly finer or slightly fluffier grind with your vaporizer and note which setting gives you smoother flavor, steadier vapor, and easier airflow.
Why grind matters:
- Even Heating: Small, uniform pieces expose more surface area to heat.
- Smooth Airflow: A proper grind allows vapor to move freely through the chamber.
- Flavor & Efficiency: Terpenes and cannabinoids release consistently, giving you more flavor and effect from less material.
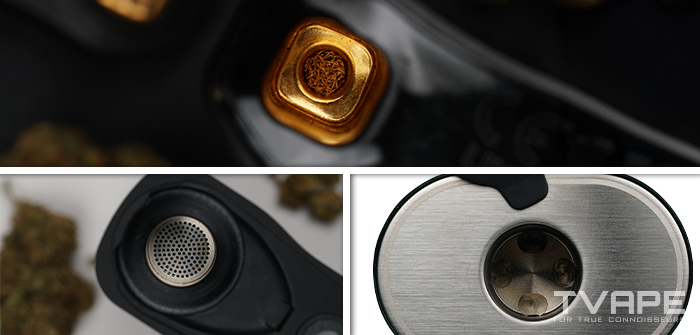
Step 2: Load the Chamber: Packing for Perfect Airflow
Once your herb is ground to that fluffy, medium-fine texture, it’s time to pack the chamber. Think of this step like brewing coffee, where you want the grounds arranged just right so hot air can flow through evenly. If you pack too tightly, the airflow will be restricted and your vapor will feel thin or harsh. Pack too loosely, and the heat won’t extract all the good stuff, leaving you with weak, wispy hits.
The sweet spot is a light to medium pack: sprinkle the ground herb into the oven, gently level it out with your finger or a packing tool, and press it down just enough so it holds together without being compressed. You should still see a little “spring” when you tap it. This balance allows the hot air to move smoothly through the material, giving you fuller clouds, richer flavor, and more efficient use of your herb.
Step 3: Power On and Preheat
With your chamber packed, it’s time to fire up your vaporizer. Turn the device on using its power button. Most portables require holding the button down for a few seconds, while desktops may just need a switch flipped. Next, set your desired temperature. Many beginners start in the mid-range (around 180–200°C / 356–392°F) for a balance of flavor and vapor production, but every herb and preference is a little different.
Now, give your vape a moment to preheat. This usually takes anywhere from 10 seconds to a minute, depending on the model. Think of it like preheating an oven before baking, and letting the device reach the right temperature ensures your first draw is smooth, flavorful, and consistent. Some vaporizers even vibrate or flash a light to let you know they’re ready to go.
Step 4: Master Your Temperature: The Art of Flavor and Effect
Temperature is a primary variable that empowers the user to customize their experience. Different heat levels unlock different flavors, aromas, and effects from your herb.
So, what is the best temperature for dry herb vaping? Finding your “sweet spot” may take a little experimentation, but the following framework gives you a solid starting point:
| Temperature Range | Flavor & Experience | Best For |
| 160–175°C (320–347°F) | Light, crisp, and very flavorful vapor. Minimal clouds, smooth on the throat. | Beginners, flavor chasers |
| 176–190°C (348–374°F) | Balanced mix of flavor and vapor density. Fuller clouds without sacrificing taste. | Balanced sessions. Flavorful but a little denser |
| 191–210°C (375–410°F) | Dense, robust vapor with stronger effects. Flavor is bolder but slightly less delicate. | Good vapor production with less focus on flavor |
| 210–220°C (410–428°F) | Heavy, intense vapor. Maximum extraction but harsher on the throat, flavor is secondary. | Short session or finishing a session |
Pro Tip: To get the most out of your temperature, start low for flavor, then gradually increase the heat to draw out stronger effects. If you want to dive deeper into the science and techniques behind temperature control, check out our dedicated guide on the best temperature settings for vaping that breaks it down in detail.
Step 5: The Inhalation Technique
How you inhale makes just as much difference as the device or temperature you choose. Unlike smoking, where sharp, quick pulls create combustion, vaporizers work best with slow, steady draws.
Start with a slow inhale that lasts about 5–10 seconds, then hold the vapor in your mouth briefly before drawing it down into your lungs. This method keeps the vapor cool, preserves flavor, and helps you get the most from every session. If your device feels restricted or too airy, adjust your packing technique or temperature, as these can influence airflow. After a few sessions, you’ll naturally find the rhythm that gives you smooth, flavorful clouds every time.
What Kind of Herbs can I Vaporize?
Dry herb vaporizers aren’t limited to just one plant. You can use your dry herb vaporizer with a wide variety of legal, properly dried herbs. Each herb brings its own unique aroma, flavor, and potential effects, which makes vaping a customizable experience. The key is that the plant material should be fully dried, ground evenly, and safe for inhalation.
Here are some common options:
- Cannabis (where legal): The most common choice, valued for its cannabinoids and terpenes that release at different temperatures.
- Chamomile: Smooth and soothing, often used for relaxation and bedtime rituals.
- Lavender: Known for its calming floral aroma; a little goes a long way.
- Peppermint or Spearmint: Refreshing, cooling sensation with a crisp flavor that clears the palate.
- Lemon Balm: Gentle citrus notes, often associated with a calming effect.
- Green Tea (dried leaves): Provides a mild, uplifting aroma when vaporized at lower temps.
- Sage, Thyme, or Rosemary: Culinary herbs that release earthy, savory vapors, sometimes used for their aromatic qualities.
Quick Temperature Guide for Common Herbs:
| Herb | Optimal Temperature Range | Flavor & Experience |
| Cannabis | 175–210 °C (347–410 °F) | Terpene-rich flavor at lower temps, denser vapor and stronger effects at higher temps |
| Chamomile | 190 °C (374 °F) | Smooth, floral, and calming |
| Lavender | 125 °C (257 °F) | Strong floral aroma, very light vapor |
| Peppermint | 170 °C (338 °F) | Cooling, refreshing vapor |
| Lemon Balm | 190 °C (374 °F) | Bright, citrusy notes with gentle effects |
| Green Tea | 180 °C (356 °F) | Light, energizing aroma with mild flavor |
| Sage | 190 °C (374 °F) | Earthy, savory vapor |
| Thyme | 190 °C (374 °F) | Sharp, herbal taste |
| Rosemary | 190 °C (374 °F) | Piney, robust aroma |
Important: Always make sure the herb you choose is safe, legal, and intended for vaporization.
Troubleshooting Common Issues: Quick Fixes for a Smooth Session
Even the best vaporizers can run into hiccups, especially when you’re still learning the ropes. Maybe you’re drawing and nothing’s coming out, or your vapor feels harsh and burnt instead of smooth and tasty. The good news is that most problems have simple fixes. Here are some common issues you might face:
| Issue | Cause | Solution |
| Device Won’t Turn On | Uncharged battery, loose connection, or incorrect power-on sequence. | Ensure the battery is fully charged. Check that all components are securely connected. Most devices require 3-5 quick presses of the power button to activate. |
| Weak or No Vapor | Improper grind or packing, clogged airflow, or low battery. | Check that the herb is ground to the correct consistency for the device (fine for conduction, coarse for convection). Ensure the chamber is not over-packed to allow for proper airflow. Clean the mouthpiece and air path to remove any blockages. |
| Harsh or Burnt Taste | Temperature is set too high, uneven heating, or dirty chamber. | Lower the temperature setting by 10-20°F (5-10°C). Stir the herb halfway through the session to promote even heating, especially with conduction devices. A regular cleaning routine will prevent residue buildup that can alter flavor. |
| Battery Drains Fast | Aging battery, or inefficient usage. | Batteries degrade over time and may need replacement. For some devices, firmware updates can improve battery efficiency. |
Maintenance & Reusability
A dry herb vaporizer is an investment, and like any good tool, it performs best when you take care of it. Regular cleaning keeps the flavor fresh, the airflow smooth, and the device running efficiently. Skipping maintenance, on the other hand, leads to clogged screens, sticky parts, and vapor that tastes more like burnt leftovers than your favorite herb.
Keeping your vape in top shape doesn’t take much effort. With a quick brush after each session and a deeper clean every so often, you’ll extend the life of your device and get consistently better results. On top of that, many vaporizers have reusable parts like dosing capsules or replaceable batteries that make them easier (and cheaper) to maintain in the long run.
Your Essential Dry Herb Vaporizer Cleaning & Maintenance Toolkit
The easiest way to stay ahead of problems is to keep a small cleaning kit on hand. You can check out the parts and accessories of dry herb vaporizers to find out which toolkits fit your vaporizer.
Here’s what every dry herb vaper should have in their toolkit:
- Small Cleaning Brush (often included): Perfect for brushing out the chamber and screens after every session.
- Cotton Swabs: Great for reaching corners and edges inside the oven or mouthpiece.
- Isopropyl Alcohol (91% or higher): The go-to solution for dissolving sticky resin on removable parts.
- Pipe Cleaners or Flexible Picks: Help clear stubborn buildup in airpaths and tight spots.
- Microfiber Cloth: Wipes down the exterior to keep your device looking fresh.
- Replacement Screens & O-Rings: Having spares ensures your vaporizer stays airtight and functional without downtime.
- Filtration: Using a bubbler or Iceborn will drastically lower the temperature of your vapor, making the vapor much smoother.
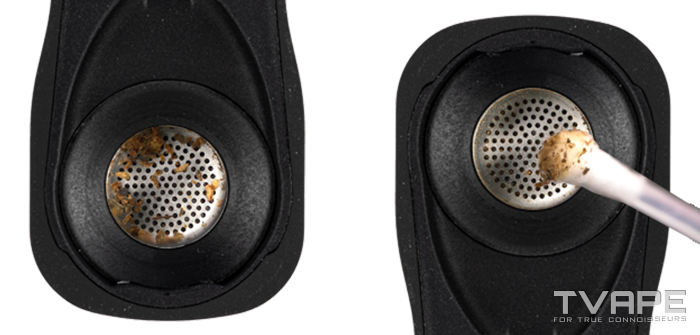
How to clean a Dry Herb Vaporizer
A clean vaporizer tastes better, draws easier, and lasts longer. Residue builds up wherever hot air meets plant material, mostly in the oven, the screen, and the mouthpiece. A small amount of routine care prevents clogs and saves you from long, frustrating deep cleans later.
What you can safely clean. Glass and stainless steel parts respond well to isopropyl alcohol at 91 percent or higher. Ceramic ovens also clean up well with alcohol on a cotton swab, as long as you avoid flooding the chamber. Silicone parts should be washed with warm, soapy water and rinsed, rather than soaked in alcohol, as alcohol can dry and deform silicone over time. Painted shells, wood, and electronics should never come into contact with alcohol. Wipe those with a barely damp cloth only.
Before you start. Turn the device off and let it cool to room temperature. Remove the battery if your model allows it. Disassemble the mouthpiece, pull any dosing capsules, and remove the screen if it is designed to come out.
After every session, the quick clean. Tap out the bowl once the device has cooled. Use a small brush to sweep the oven walls and the screen while the residue is still soft. If the mouthpiece feels sticky, twist a dry cotton swab through the airway to pick up loose particles. This sixty-second routine prevents most airflow problems and keeps flavor bright.
Once a week, the deeper clean. Place removable glass and stainless parts in a small dish and cover them with isopropyl alcohol for twenty to thirty minutes. Agitate gently, then rinse with warm water and let everything air dry completely. For the oven, dampen a cotton swab with alcohol and wipe the hot spots and the lip of the chamber. Follow with a dry swab to remove residue.
Reassemble and burn off. When every part is bone dry, put the device back together. Run a short empty heat cycle at a medium temperature for one to two minutes. This clears any trace of alcohol smell and confirms that airflow feels open.
Common problems and the clean fix. If the draws feel tight, the screen is usually the culprit. Brush first, then swap the screen if the pull is still stiff. If flavor tastes cooked or bitter sooner than usual, wipe the oven lip and mouthpiece airway, since residue there heats faster and can tint the taste.
Keep the routine simple. Brush after you vape, deep clean on a schedule that matches how often you use the device, and replace small consumables like screens and O rings when they no longer look or feel right. Your vapor will taste better, and your device will run like new.
FAQs
What’s the difference between vaping and smoking dry herbs?
Vaping warms your flower just enough to release cannabinoids and terpenes without burning it. This means no smoke, no ash, and far fewer harsh byproducts. You get smoother inhales and richer flavors compared to smoking a joint or pipe.
How do dry herb vaporizers actually work?
A vaporizer uses either a heated surface, hot air, or a combination of the two to gently cook your ground herb. As you inhale, the warm air lifts out the active compounds and flavors, which then travel through the mouthpiece as vapor. The process is simple once you see it in action.
Is dry herb vaping safer than smoking or vaping oils?
While nothing you inhale is completely risk free, dry herb vaping is generally considered less harmful than smoking because it avoids combustion. It is also different from vaping oils, which sometimes contain additives. The lung injuries linked to vaping in the news were tied to illicit oil cartridges, not dry herb vaporizers.
Will a dry herb vape get me higher than smoking?
It often feels stronger because vaporizers are efficient at pulling cannabinoids out of the flower. Even a small amount can produce noticeable effects. Beginners should always start slow and increase gradually to avoid overdoing it.
Does vaping still smell like smoke?
Yes, but the odor is much lighter and fades quickly. It is far less noticeable than smoke from a joint or pipe, which makes vaporizers a popular choice for people who want more discreet sessions.
What is the best temperature for vaping?
The ideal temperature depends on the type of experience you want. Lower heat brings out more flavor and lighter effects, while higher heat produces denser vapor and stronger results. Many people find a middle range between 370 °F and 390 °F to be the sweet spot.
Can you vape just kief in a dry herb vape?
You can, but kief is very potent. Most people prefer to mix a pinch of kief with ground flower to balance the experience and prevent clogging the chamber.
How do I tell when my dry herb is done in a vaporizer?
You will know your session is over when the vapor becomes thin, light, and loses flavor. The flower in the chamber also changes color from green to a toasted brown. Once the taste is flat and the clouds are barely there, it is time to empty the chamber. Do not wait until it turns black, because that means it has started to burn.
Where can I buy dry herb vaporizers?
Dry herb vaporizers are sold both online and in local head shops or dispensaries, depending on where you live. If you want variety and trusted reviews, online stores are often the best bet. One popular option is TVape, which offers a wide range of portable and desktop vaporizers along with guides to help you choose the right model.


